Salesforce Requirements: API Access (See which editions provide API Access here)
Setting up the Integration
1) On the left panel, click User Settings > Integrations.
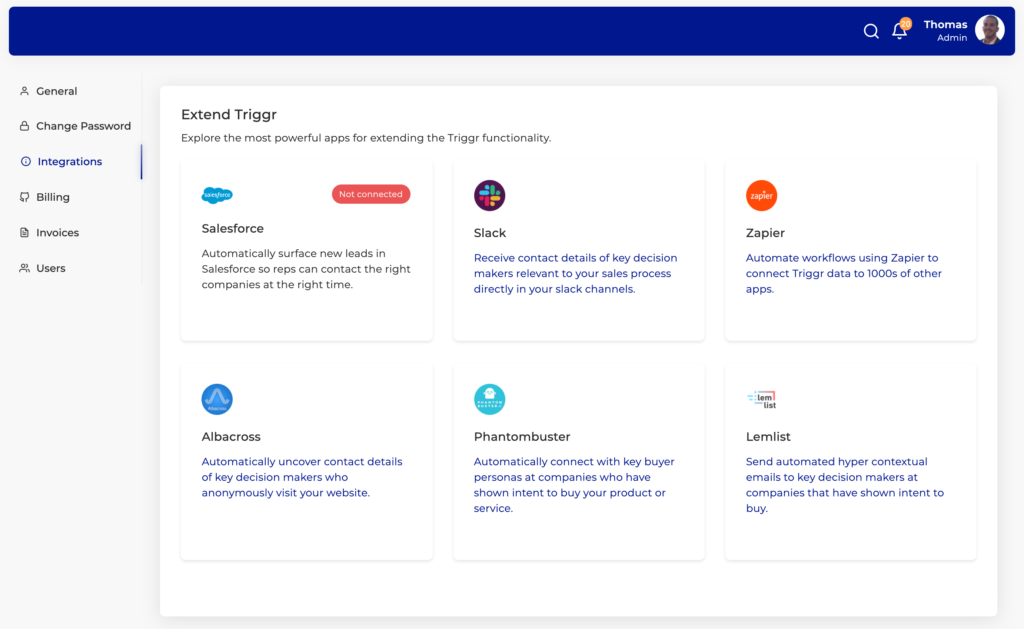
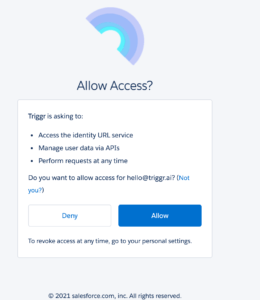
2) Sign-in to salesforce
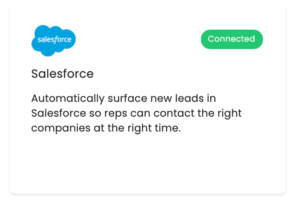
3) Once sign-in, you should see a ‘connected’ label on the integration. Click to edit.
General Settings
Under General setting, you are able to see the salesforce credentials you have used to connect to salesforce with, along with the rules for lead creation and updates.
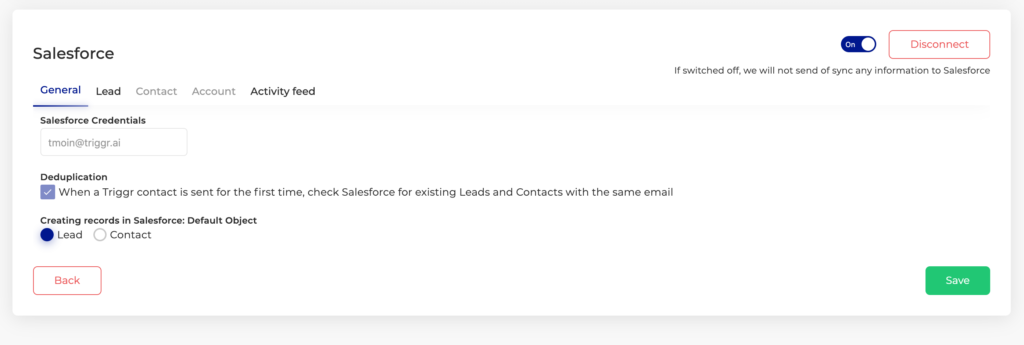
Deduplication Rules
By default, Triggr will check Salesforce for existing Leads and Contacts with the same email. If a matching email already exists in Salesforce, the update will be made on the existing record. Triggr will not create duplicates of the same email address in Salesforce.
If multiple Trigger events occur on the same contact record, then a new Task will be created on the Activity Feed of the record on each occurrence.
Creating records in Salesforce
Depending on the configuration of your Salesforce instance, you can set net new leads to be created under the Lead Object, or the Contacts Object in Salesforce. By Default, net new leads will be created on the Lead Object. If, however, you would like them created as Contacts, then Triggr will Create an Account (If one does not already exist), and assign a new contact to that leads.
If however, a lead or contact already exists with the same email address, then Triggr will append the update to that record, based on your update preferences in Field Mapping.
Field Mapping
Triggr will send through the below properties into the corresponding Salesforce field selected.

- Last Name
- First Name
- Title
- Company
- City
- State/Province
- Zip/Postal Code
- Country
- Phone
- Website
- Lead Source
- Industry
Update Rules
Fields are updated, based on the rules you set, allowing you to customise the information shared with your Salesforce instance.
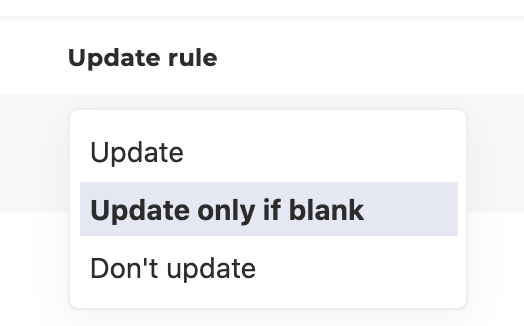
- Update – Always update Salesforce with information from Triggr
- Update only if blank – If Salesforce already has information in this field, Triggr will not override it.
- Don’t update – Triggr will not update this field, in any circumstance.
Tasks
Triggr provides context for conversation through alerting your reps to important Triggr Events. The Triggr Event and any additional context can be added as a Task in Salesforce.
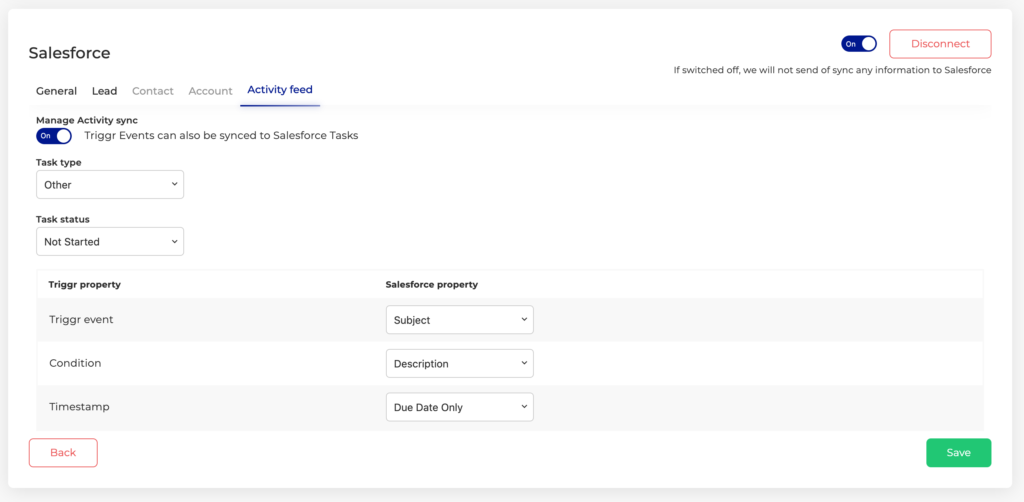
Task Status – Task Status is marked as Not Started by Default
Triggr Event Details – Triggr will send through the below information in Salesforce Tasks.
Adding Salesforce to your Triggr Event
If Salesforce is selected in the Notifications Channels of your Triggr Event, every time an event occurs, we’ll send/update the lead directly in Salesforce, along with context of the event as a task in the Activity Feed.
Pushing Leads directly into Salesforce from a company profile page
In addition to the Triggr Events being fed directly into salesforce, when they occur, reps can also push leads into salesforce, based on their own research.
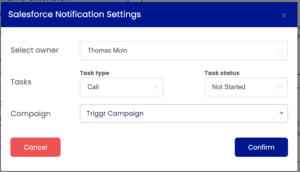
1) When looking at any Company Profile page, in Triggr, you can push leads into Salesforce, from the Employees table.

2) Simply click the employees that you want to push to Salesforce, and click ‘Push to Salesforce’.
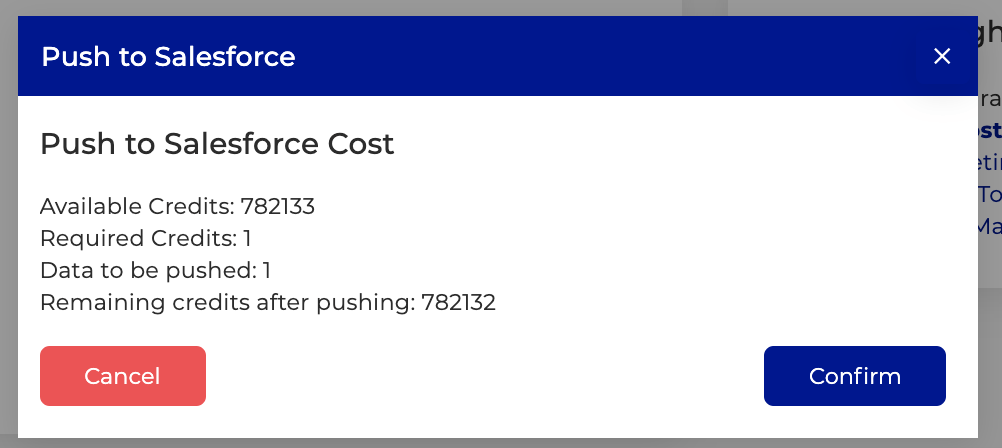
3) Confirm the details to push the lead into salesforce.

4) The Lead will be assigned to the user that pushed the lead into Salesforce.
See Also: